
Charging a portable power station while driving is a practical way to replenish battery capacity during road trips, camping trips, and off-grid travel. However, the amount of energy you can add depends on how you connect the station, your vehicle’s electrical limits, and the charging input supported by your equipment.
For occasional top-ups, a standard 12V car outlet may be sufficient. If you need to replenish a larger battery more quickly, a compatible alternator charger may be a better solution. Neither method guarantees a particular charging speed: the actual input power is limited by the vehicle, the charging equipment, the cables, and the power station itself.
In this guide, you’ll learn how to charge a portable power station from a car while driving, compare the available charging methods, estimate how much energy a journey can add, and connect your equipment safely. You’ll also learn what to check if charging is slower than expected and when a dedicated alternator charger makes more sense than a standard car outlet.

Table of Contents
Quick Answer: How to Charge a Portable Power Station While Driving
A standard 12V car outlet can provide gradual charging during a drive, while a compatible alternator charger can deliver more power when the vehicle and power station support it. The right option depends on how much energy you need and how long you drive.
| Charging method | Best for | What to expect |
|---|---|---|
| Standard 12V car outlet | Occasional top-ups | Lower-power charging; actual input depends on the vehicle and equipment. |
| Dedicated alternator charger | Frequent travel and higher energy demands | Potentially much higher charging power with a compatible, properly installed system. |
| Solar or AC charging | Charging while parked or before departure | Reduces how much energy you need to recover while driving. |
Example: At an average charging input of 100W, a four-hour drive supplies 400Wh to the charging system. Assuming 85% charging efficiency, approximately 340Wh may be stored in the battery. These figures are illustrative estimates, not guaranteed results.
If you only need occasional top-ups, start by checking whether your vehicle’s 12V outlet can meet your needs. If you regularly need to replenish substantial battery capacity during shorter drives, evaluate a compatible alternator charger.
What to Check Before Charging a Power Station from Your Car
Before choosing how to charge a portable power station while driving, check that your vehicle, charging cable or device, and power station are compatible. A connection that fits physically is not necessarily electrically compatible.
Three things matter most: the power station’s charging-input requirements, the vehicle’s available voltage and current, and the charging method you plan to use. Checking these specifications first helps you avoid slow charging, incompatible connections, and unnecessary strain on your vehicle’s electrical system.
Check the Power Station’s Charging Input
Start by locating the charging input on your portable power station. Depending on the model, it may be labeled DC input, car input, or vehicle charging input. Check the user manual or the specifications printed beside the port to identify the supported input voltage, current, connector type, and maximum charging power.
Make sure the charging cable or device is designed for that input. A cable that physically fits the port does not necessarily provide the correct voltage or polarity, and a compatible connector alone does not guarantee that the station can accept the available charging power.
Pay particular attention to the difference between an input and an output. A power station may have a 12V DC output for powering a car refrigerator or other equipment. That output supplies power to connected devices; it is not necessarily designed to receive power from the vehicle. For charging, use the designated input and a manufacturer-approved or otherwise compatible charging method.
If you’re still deciding which power station fits your overall needs, our portable power station buying guide explains how to compare capacity, output, charging options, and portability.
If you plan to use a dedicated alternator charger, check its compatibility requirements as well. Confirm that the charger supports your power station’s charging input and that its output voltage, connector, and charging profile are suitable for your specific model. Do not assume that a charger designed for one power station will work with another.
Check Your Car’s 12V or 24V System and Outlet Rating
Next, check the vehicle’s electrical system and the limits of the outlet you intend to use. Many passenger cars have a 12V accessory outlet, while some trucks and other vehicles use 24V systems. The available current and power can also vary between vehicles and between outlets in the same vehicle.
Do not assume that every 12V outlet can continuously supply the same amount of power. The outlet may have a current limit, a dedicated fuse rating, or operating restrictions specified by the vehicle manufacturer. These limits determine how much power is available for charging.
Check the following before connecting your power station:
Vehicle owner’s manual: Look for the accessory outlet’s rated voltage, maximum current, power limit, and any restrictions on use while driving.
Fuse information: Check the vehicle’s fuse diagram and the rating specified for the relevant circuit. The fuse rating is useful information, but it does not by itself establish the outlet’s safe continuous operating limit.
Power station manual: Confirm that the station accepts the vehicle’s voltage and that its charging input is compatible with the available power.
Charging cable specifications: Verify that the cable and connectors are rated for the intended current and use.
For example, a 12V outlet rated for 10A has a nominal electrical power limit of 120W before accounting for voltage variation and any other restrictions. An outlet rated for 15A has a nominal limit of 180W under the same simplified calculation.
These figures illustrate the relationship between voltage, current, and power; they are not universal ratings for car outlets. Always follow the limits specified for your actual vehicle and charging equipment.
If your vehicle uses a 24V system, do not connect it to a charging input that only supports 12V. Use a charging solution explicitly compatible with the vehicle’s voltage and the power station’s input requirements.
Check Whether Your Vehicle Can Support the Charging Method
The charging method you choose must be compatible with the vehicle as well as the power station. A standard accessory outlet, a dedicated alternator charger, and a built-in AC outlet draw power from the vehicle in different ways and may have different installation and operating requirements.
For a standard 12V car outlet, confirm that the outlet supplies power in the vehicle’s intended operating mode and that its current limit is sufficient for the charging input. Some outlets switch off when the ignition is off, while others may remain energized. Check your vehicle’s manual rather than assuming how the outlet behaves.
For a dedicated alternator charger, verify the charger’s vehicle compatibility, supported system voltage, installation requirements, and connection method. Some units require a dedicated connection to the vehicle’s electrical system rather than a plug-in accessory outlet. Follow the manufacturer’s installation instructions, including requirements for appropriately rated wiring and overcurrent protection. If the installation involves high-current wiring or connections to the vehicle battery, use a qualified installer when required.
For a built-in vehicle AC outlet, check its continuous power rating and compare it with the input requirements of the power station’s AC adapter. The outlet must be capable of supplying the adapter’s required power under the conditions specified by the vehicle manufacturer.
Hybrid vehicles and electric vehicles require additional care. Their low-voltage accessory systems, operating modes, and available power can differ from those of conventional vehicles. Do not assume that an EV’s high-voltage traction battery can be accessed through its 12V outlet or that an accessory outlet can support a high-power charging setup. Check the vehicle manual and the charger manufacturer’s compatibility guidance before proceeding.
Once you have confirmed the voltage, available power, input compatibility, and installation requirements, you can compare the available charging methods and choose the one that fits your setup.
Ways to Charge a Portable Power Station While Driving

There are three main ways to charge a portable power station while driving: use the vehicle’s 12V accessory outlet, install a compatible alternator charger, or use a built-in vehicle AC outlet if one is available and powerful enough.
These methods differ in charging speed, installation requirements, and compatibility. A standard 12V outlet is usually the simplest option, while a dedicated alternator charger can support higher charging power when the vehicle and power station are designed to work with it. A built-in AC outlet may also be useful, but its output rating determines whether it can run the power station’s AC charging adapter.
The best method depends on how much energy you want to add during a drive, how often you travel, and what your equipment can safely support.
Method 1: Use the Car’s 12V Accessory Outlet
A vehicle’s 12V accessory outlet is often the easiest way to charge a portable power station without installing additional equipment. You connect a compatible car-charging cable from the vehicle outlet to the power station’s designated DC or car-charging input.
The vehicle supplies power through the accessory circuit, and the power station’s charging system manages the energy entering its battery. The exact connection and supported input power depend on the power station model, so use the cable and input specified by its manufacturer.
When this method makes sense
A 12V outlet can be suitable when you want to top up the battery during a long drive, maintain some reserve capacity between stops, or add energy to a smaller power station without modifying the vehicle.
Its main advantage is simplicity: if the vehicle outlet and power station are compatible, you may not need any additional charging equipment beyond the correct cable.
Why charging is usually slower
The available power is limited by the vehicle’s accessory outlet, its wiring and fuse, the charging cable, and the power station’s maximum DC input. The lowest applicable limit constrains the charging rate.
For example, a 12V outlet rated at 10A has a nominal power limit of 120W. That does not mean the power station will continuously receive 120W; the actual input may be lower because of voltage variation, equipment limits, or charging conditions.
If you need to replenish a large battery substantially during a relatively short drive, this method may not provide enough charging power. Check the vehicle manual and the power station’s specifications before relying on it for a particular charging target.
Method 2: Use a Dedicated Alternator Charger
A dedicated alternator charger is designed to draw power from a vehicle’s electrical system and provide a suitable charging output for a compatible portable power station. Depending on the system, it may use a dedicated high-current connection rather than relying on the vehicle’s standard 12V accessory outlet.
The charger regulates the electrical supply according to its design and the requirements of the connected equipment. This allows compatible systems to support higher charging power than a typical accessory outlet, provided the vehicle’s electrical system, wiring, charger, and power station can all support it.
When this method makes sense
An alternator charger may be a better fit if you regularly travel off-grid, drive for several hours at a time, or need to replenish a substantial amount of battery capacity between destinations. It can also be useful when a standard 12V outlet cannot provide enough power for your intended charging schedule.
If you’re comparing specific models, see our guide to the best alternator chargers for portable power stations, which covers the options available for different vehicle-charging needs.
However, higher charging power is not automatic. The actual rate depends on the charger’s capabilities, the vehicle’s available electrical output, the installation, and the power station’s supported input.
What to check before choosing one
Vehicle compatibility: Confirm that the charger supports your vehicle’s electrical system and operating requirements.
Power station compatibility: Check the supported charging input, voltage, connector, and charging profile.
Wiring and protection: Follow the manufacturer’s installation instructions for cable sizing, routing, and overcurrent protection.
Available charging power: Verify the limits of the complete setup rather than relying only on the charger’s advertised maximum output.
Installation requirements: Some systems require dedicated wiring or professional installation. Do not improvise high-current connections to the vehicle battery.
A dedicated alternator charger is more involved than plugging into an accessory outlet, but it may be worthwhile when charging speed is an important part of your travel setup.
Method 3: Use a Built-In Vehicle AC Outlet, If Available
Some vehicles provide a built-in AC power outlet. If its voltage, frequency, and continuous power rating are compatible with the power station’s standard AC charging adapter, you may be able to charge the station using that adapter while driving.
This option can be convenient because it may avoid the need for a separate car-charging cable or dedicated alternator charger. However, compatibility depends on the specific vehicle and power station.
Check the vehicle outlet’s continuous output rating and compare it with the AC adapter’s input requirements. The outlet must be able to supply the required power under the vehicle manufacturer’s stated operating conditions. Also check whether the outlet is available while the vehicle is moving and whether its power output changes with the vehicle’s operating mode.
Do not assume that an ordinary 12V accessory outlet can provide the same power as a built-in AC outlet. A separate inverter connected to a 12V outlet does not remove the outlet’s current and circuit limits. If you need substantially more charging power, use a compatible charging system designed for that purpose rather than attempting to bypass the vehicle’s limits.
Because built-in AC outlets vary considerably between vehicles, treat this as a vehicle-specific option, not a universal charging method.
Which Charging Method Should You Choose?
Choose the method based on the amount of energy you need to add, the time available for charging, and the limits of your vehicle and power station.
| Charging method | Best suited for | Relative charging speed | Main limitation | What to check |
|---|---|---|---|---|
| 12V accessory outlet | Occasional top-ups and simpler setups | Usually lower | Vehicle outlet and power station input limits | Outlet rating, cable, DC input |
| Dedicated alternator charger | Regular off-grid travel and larger charging needs | Potentially higher | Compatibility, installation, and available vehicle power | Charger specifications, wiring, station input |
| Built-in vehicle AC outlet | Vehicles with a suitable factory-installed outlet | Depends on outlet and AC adapter | Limited by the outlet’s continuous power rating | AC output rating, adapter requirements, operating conditions |
These are relative comparisons, not guaranteed charging rates. A particular setup may perform differently depending on the equipment and operating conditions.
For occasional charging during a long drive, a compatible 12V outlet may be sufficient. If you need to restore a significant amount of energy regularly, consider a dedicated alternator charger that supports your vehicle and power station. If your vehicle already has a suitable AC outlet, check whether it can run the station’s standard adapter before purchasing additional equipment.
Whichever method you choose, verify the specifications of the complete charging system. The usable charging power is determined by the limits of the vehicle, connections, charging equipment, and power station—not by one component’s advertised maximum wattage alone.
How Long Does It Take to Charge a Power Station While Driving?

Before estimating charging time, distinguish three different values:
Vehicle outlet rating: The voltage and maximum current or power supported by the vehicle’s outlet and circuit. This defines an electrical limit, not a guarantee of the power the station will receive.
Charging input power (W): The power actually supplied to the power station during charging. It depends on the vehicle, cable or charger, and the station’s input limit.
Stored battery energy (Wh): The energy added to the battery after charging losses. It is generally lower than the energy supplied to the charging system.
For example, 100W supplied over four hours equals 400Wh of input energy. At an illustrative 85% efficiency, approximately 340Wh would be stored. Use the sustained average input power of your complete setup for estimates rather than assuming the vehicle outlet’s maximum rating is continuously available.
The time it takes to charge a portable power station while driving depends on how much energy the battery needs, the average charging input power, and the energy lost during charging.
Your vehicle, charging equipment, cables, and power station all limit the available charging power. The rate may also decrease as the battery approaches full capacity, so advertised maximum wattage should not be treated as a guaranteed average.
Calculate How Much Energy You Can Add During a Drive
Use this formula to estimate how much energy the battery can store during a journey:
Energy stored (Wh) = Average charging input (W) × Driving time (hours) × Charging efficiency
Charging efficiency represents the assumed fraction of input energy that becomes stored battery energy. For the examples below, we will use an illustrative efficiency of 85%, or 0.85. This is a calculation assumption, not a measured efficiency for every power station or charging method.
In these calculations, average charging input power refers to the power supplied to the charging system before the losses represented by the efficiency factor. If the power reading already reflects those losses, do not apply the same efficiency adjustment again.
For example, if a power station receives an average input of 100W for three hours:
100W × 3 hours × 0.85 = 255Wh
The charging system receives 300Wh over that period, while the estimated energy stored in the battery is 255Wh. The battery must also have enough remaining capacity to store that energy.
How Much Energy Can You Add in 2, 4, or 6 Hours?
The following table assumes an average charging input of 100W and an illustrative charging efficiency of 85%.
| Driving time | Energy supplied at the input | Estimated energy stored (85% efficiency) |
|---|---|---|
| 2 hours | 200 Wh | 170 Wh |
| 4 hours | 400 Wh | 340 Wh |
| 6 hours | 600 Wh | 510 Wh |
These figures are mathematical estimates, not guaranteed charging results. To estimate your own setup, replace 100W with the average input power it can realistically sustain. The stored energy will also depend on charging efficiency and the battery’s remaining capacity.
How Much Can You Recharge During a Four-Hour Drive?
The percentage of charge gained depends on both the energy stored and the power station’s battery capacity. The same amount of stored energy represents a larger percentage of a smaller battery than a larger one.
Consider two hypothetical charging setups operating for four hours: one delivering an average input of 100W and another delivering 300W. At an assumed charging efficiency of 85%, they could store approximately 340Wh and 1,020Wh, respectively, before accounting for the battery’s remaining capacity.
| Battery capacity | At 100W input | At 300W input |
|---|---|---|
| 500Wh | About 68% | Up to 100% |
| 1,000Wh | About 34% | Up to 100% |
| 2,000Wh | About 17% | About 51% |
These estimates assume the battery starts at 0% and that its displayed charge level corresponds proportionally to its rated capacity. Results cannot exceed 100%, because the battery cannot store more energy than its available capacity. Actual results may differ because of charging behavior, equipment limits, and operating conditions.
The 100W and 300W figures are illustrative average input powers, not guaranteed ratings for a standard car outlet or an alternator charger. A higher-power setup can store energy faster, but only if the vehicle, charging equipment, and power station support that input.
Estimate Charging Time from Your Starting Battery Level
To estimate how long charging will take, first calculate how much energy the battery needs to gain.
Energy needed (Wh) = Battery capacity (Wh) × Increase in charge level (%) ÷ 100
Suppose a power station has a rated capacity of 1,000Wh and you want to increase its charge level from 30% to 70%. The increase is 40 percentage points, corresponding to approximately 400Wh of nominal battery energy:
1,000Wh × 40 ÷ 100 = 400Wh
Next, estimate the charging time using the average input power before the losses accounted for by the efficiency factor:
Charging time (hours) = Energy needed (Wh) ÷ (Average charging input (W) × Charging efficiency)
Using an average charging input of 100W and the same illustrative efficiency of 85%:
400Wh ÷ (100W × 0.85) ≈ 4.7 hours
Under these assumptions, charging from 30% to 70% would take approximately 4.7 hours.
This is a simplified estimate. The displayed battery percentage may not correspond exactly to usable energy, and actual input power can fluctuate or decrease as the battery fills.
Charging-Time Estimates by Input Power
The table below estimates the time needed to store 400Wh of battery energy at different average input power levels, assuming 85% charging efficiency.
| Average input power | Estimated time to store 400Wh |
|---|---|
| 100W | 4.7 hours |
| 200W | 2.4 hours |
| 300W | 1.6 hours |
| 500W | 0.9 hours |
These values are rounded mathematical estimates, not guaranteed real-world charging times. Actual charging may take longer if the vehicle cannot sustain the assumed power, the station has a lower input limit, or charging slows as the battery approaches the target level.
For the most useful estimate, use the average input power your complete charging setup can realistically sustain rather than its advertised maximum wattage.
How to Charge a Power Station from a Car Safely: Step by Step
Once you have confirmed that your vehicle and portable power station are compatible, follow these steps to set up the charging system safely. The exact procedure depends on whether you are using a standard 12V accessory outlet, a built-in vehicle AC outlet, or a dedicated alternator charger.
The instructions below focus on connections intended for ordinary users. A permanently installed alternator charger may require dedicated wiring, circuit protection, and installation procedures specified by its manufacturer. Do not treat this type of installation as a simple plug-in connection or improvise high-current wiring.
Carbon monoxide warning: Never run a conventional vehicle’s engine in an enclosed garage or another poorly ventilated space to charge a power station. Vehicle exhaust can contain carbon monoxide, a colorless, odorless gas that can be fatal. Operate the vehicle only in accordance with the manufacturer’s safety instructions.
Step 1: Confirm Compatibility and Read the Manuals
Before connecting anything, check the manuals for your vehicle, power station, and charging equipment.
Confirm the following:
The vehicle outlet or charging system provides the voltage required by the charging equipment.
The power station supports the selected charging method and input voltage.
The cable and connectors are specified for the intended equipment.
The expected charging current and power stay within the limits of the vehicle circuit and power station.
Any operating conditions or restrictions specified by the manufacturers are met.
If you are using an alternator charger, verify that it is compatible with both your vehicle and power station. Check whether it requires a dedicated installation and whether the manufacturer specifies particular wiring, fuses, or other protective components.
If any important specification is unclear, do not guess. Confirm compatibility with the equipment manufacturer before proceeding.
Step 2: Inspect the Cable, Plug, and Charging Port
Inspect the charging cable and both connectors before each use. Look for damaged insulation, bent contacts, loose connections, discoloration, or signs of melting. Check the vehicle outlet and power station input for dirt, debris, or visible damage.
Use the correct cable for the charging method. A connector that fits into a port does not necessarily have the correct voltage, polarity, or current rating.
Do not use a damaged cable, a loose plug, or a connector that shows signs of overheating. Do not modify connectors or bypass protective features to make incompatible equipment work.
For an installed alternator charger, inspect only the accessible components that the manufacturer identifies as user-serviceable. Do not open electrical enclosures or handle exposed high-current wiring as part of a routine pre-trip check.
Step 3: Secure the Power Station in the Vehicle
Place the power station on a stable, level surface where it cannot slide, tip over, or become a projectile during sudden braking. Use suitable cargo restraints or the vehicle’s approved tie-down points when necessary.
Keep the unit away from direct heat sources and protect it from water, spills, and excessive dust. Do not block its ventilation openings, and follow the manufacturer’s clearance requirements.
Position the charging cable so it cannot be pinched by the tailgate, seat, or cargo. Keep it away from pedals, moving parts, sharp edges, and areas where passengers could trip over it.
The power station should not obstruct the driver’s visibility, access to vehicle controls, or passenger safety equipment. Secure loose charging accessories and other cargo before departure.
Step 4: Start the Vehicle or Activate the Required Operating Mode
Check how your vehicle supplies power to the outlet or charging system. Some accessory outlets operate only when the ignition is on; others may remain energized when the vehicle is parked.
For a standard 12V outlet, follow the vehicle manufacturer’s instructions for the appropriate operating mode. Do not assume that the outlet will switch off automatically or that leaving it energized is safe for the starter battery.
For a dedicated alternator charger, follow the charger manufacturer’s instructions for vehicle startup, activation, and shutdown. Some systems manage charging automatically, while others have specific operating requirements.
Hybrid and electric vehicles may use different accessory-power controls. Follow the vehicle manual rather than assuming that the engine must be running—or that an apparently switched-off vehicle has deactivated every electrical circuit.
Never operate the charging setup in a way that distracts you from driving. Complete the initial connection and any adjustments while safely parked. Do not reach into the cargo area or handle charging equipment while the vehicle is moving.
Step 5: Connect the Correct Cable and Confirm Charging
With the vehicle safely parked, connect the charging equipment according to the instructions for your selected method.
For a standard 12V outlet, use the compatible car-charging cable and connect it between the outlet and the power station’s designated charging input. Do not connect the cable to a 12V output on the power station intended for powering other devices.
For a built-in vehicle AC outlet, use the power station’s AC adapter only if the outlet’s specifications support the adapter’s requirements.
For a dedicated alternator charger, follow the manufacturer’s connection and startup procedure. If the charger requires a permanent high-current installation, use the specified installation method rather than improvising a direct battery connection.
Once connected, check the power station’s display or charging indicators. Confirm that charging has started and, if the station displays input power, note the wattage.
If the station does not begin charging, stop and check the manuals, cable compatibility, outlet status, and input settings. Do not repeatedly reconnect equipment or bypass a protective shutdown without identifying the cause.
Step 6: Monitor Input Power and Check for Excessive Heat
If your power station displays charging input power, check it after charging begins. The reading helps you understand how much power the station is receiving and whether the result is broadly consistent with your setup’s expected limits.
Do not assume that the reading must remain constant. Input power can vary with vehicle conditions, the charging equipment, and the power station’s charging behavior.
Pay attention to the cable, plug, and accessible connectors. Slight warmth may occur during normal operation, but excessive heat, a burning smell, discoloration, crackling, or softened plastic can indicate a problem.
If you notice any of these warning signs, stop charging as soon as it is safe to do so and disconnect the equipment according to the manufacturer’s instructions. Do not continue charging simply because the power station still displays an input reading.
If a plug or outlet repeatedly overheats, discontinue using that connection until the cause has been identified. A different cable alone may not solve an undersized outlet, poor contact, or circuit problem.
Step 7: Disconnect Safely When You Stop
When you reach your destination or no longer need to charge, follow the shutdown procedure for your charging method.
For a standard accessory outlet, stop charging and disconnect the cable using the connector body rather than pulling on the wire. Check whether the outlet remains energized and follow the vehicle manufacturer’s instructions for preventing unnecessary battery drain.
For a built-in AC outlet, switch off or deactivate the outlet as directed by the vehicle manufacturer before disconnecting the adapter, if required by the instructions.
For an alternator charger, follow its specified shutdown sequence. Do not disconnect permanently installed high-current wiring as though it were an ordinary accessory plug.
Before leaving the vehicle, check that cables are disconnected or secured as appropriate, the power station is stable, and no equipment has been left in a position where it could be damaged or drain the vehicle battery.
A safe routine is straightforward: verify compatibility, inspect the equipment, secure the station, confirm charging, monitor for warning signs, and follow the correct shutdown procedure. These steps help reduce avoidable problems without assuming that every vehicle or charging system works the same way.
How to Protect Your Car’s Battery and Electrical System
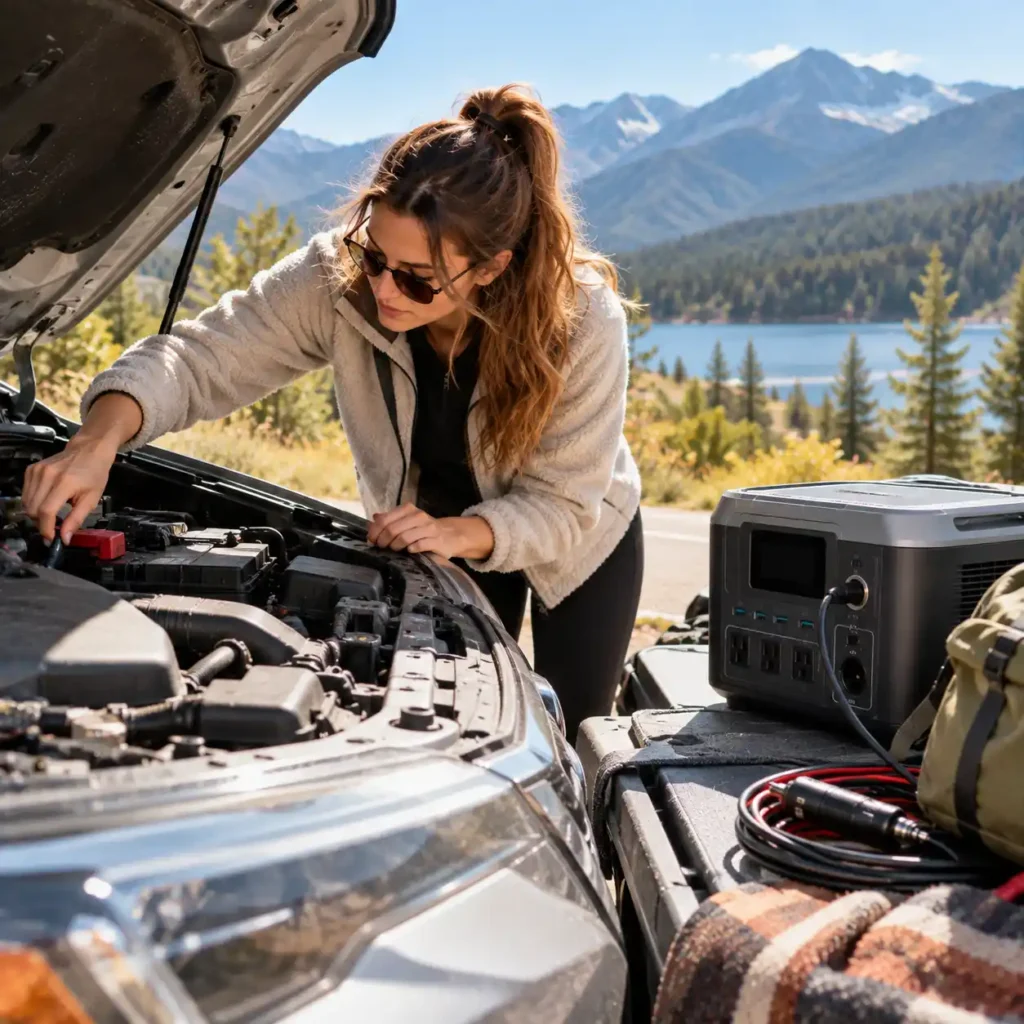
Charging a portable power station while driving draws additional power from your vehicle’s electrical system. The main concerns are draining the starter battery when the vehicle is not supplying power as expected, overheating an overloaded or poorly connected outlet, and using wiring that is not rated for the charging current.
The precautions depend on the charging method. A standard 12V accessory outlet has different limits from a dedicated alternator charger, and neither should be assumed to provide unlimited power. Follow the vehicle and charging-equipment manufacturers’ instructions, and stop using any connection that shows signs of electrical damage or overheating.
Avoid Draining the Starter Battery
A vehicle’s starter battery provides the power needed to start the engine and operate low-voltage electrical systems. Depending on the vehicle and charging setup, a power station connected to an accessory outlet may continue drawing power when the engine is off or the vehicle is parked.
This can reduce the charge available to start the vehicle. The risk depends on how the outlet is controlled, how much current the charging equipment draws, how long it remains connected, and the condition of the starter battery.
The AAA guide to accessories that can drain a car battery explains why drivers should be cautious about leaving electrical devices connected when the vehicle is parked.
To reduce the risk:
Check how the outlet behaves when the vehicle is off. Some accessory outlets switch off with the ignition, while others remain energized. Confirm the behavior in your vehicle’s manual rather than relying on assumptions.
Follow the charging system’s shutdown procedure. Disconnect or deactivate the equipment as directed when you stop driving, unless the manufacturer explicitly supports the intended parked operation.
Do not rely solely on automatic shutoff. A vehicle outlet, power station, or charger may have protective features, but their presence and behavior vary by model. Confirm what each feature actually protects against.
Consider the vehicle’s operating mode. An engine that is not running does not necessarily mean the vehicle is supplying no power, and a vehicle that appears switched off may still have energized circuits. Follow the vehicle manufacturer’s guidance.
Stop charging if the vehicle displays an electrical-system warning. Investigate the warning before continuing to use the charging setup.
A dedicated alternator charger may include controls designed for vehicle charging, but you should verify its documented protection and shutdown behavior. Do not assume it will prevent every form of starter-battery discharge under every operating condition.
Prevent Overheating and Melted 12V Plugs
A 12V accessory outlet and its plug must carry the current required by the charging equipment. If the current exceeds the connection’s rating, the contact is poor, or the plug and outlet are damaged, heat can build up at the connection.
Even when a setup appears to work, a loose or worn connector can create resistance and localized heating. A cable or plug that becomes excessively hot should not be treated as a normal side effect of charging.
Reduce the risk by checking the outlet and cable condition before use, keeping the connection secure, and staying within the vehicle manufacturer’s limits. Do not use damaged plugs, loose adapters, or cables with exposed conductors. Avoid routing cables where they can be pinched or pulled out of position.
Stop charging if you notice excessive heat, a burning smell, discoloration, crackling, or softened or melted plastic. If it is safe to do so, stop the charging process and disconnect the equipment according to the manufacturer’s instructions. Do not touch exposed conductors or attempt to remove a dangerously hot or damaged connector by force.
Do not solve overheating by installing a larger fuse or bypassing the vehicle’s protection. A fuse must be correctly rated for the circuit and wiring. If the plug or outlet repeatedly overheats, discontinue use until the cause has been identified.
A higher-power alternator charger may avoid relying on a standard accessory outlet, but it still requires correctly rated wiring, suitable connections, and appropriate circuit protection. It is not inherently safe simply because it can deliver more power.
Understand the Limits of Direct Battery Connections
Connecting a charging device directly to a vehicle battery is not a universal way to obtain more charging power. A battery connection does not remove the limitations of the charger, the power station’s input, the vehicle’s electrical system, or the wiring used.
High-current connections require equipment designed for the intended voltage and current. Depending on the system, this can include correctly sized conductors, suitable terminals, properly rated fuses or other overcurrent protection, and a charger designed for the vehicle and power station.
An improvised connection can create risks including short circuits, overheated wiring, damaged equipment, and electrical fire. A fuse is not optional protection to be added later, and the battery terminal is not a substitute for a properly engineered charging circuit.
If a dedicated alternator charger requires a battery connection, follow its installation documentation precisely. Use the specified cable sizes, routing, protective devices, and connection points. If you are unfamiliar with high-current automotive wiring, have the system installed by a qualified professional.
For most users, the safer choice is a compatible plug-in charging method within the vehicle outlet’s documented limits or a properly installed alternator-charging system—not an improvised direct battery connection.
Special Considerations for EVs, Hybrids, and 24V Vehicles
Electric vehicles, hybrids, and vehicles with 24V electrical systems require additional compatibility checks. Their available accessory power, operating modes, and electrical architecture may differ from those of a conventional 12V vehicle.
Electric vehicles (EVs): Do not assume that a 12V accessory outlet can supply high charging power or that the vehicle’s high-voltage traction battery can be accessed through an ordinary accessory connection. Check the owner’s manual for outlet limits and operating restrictions, including whether the outlet remains available while driving.
Hybrid vehicles: The combustion engine may start and stop automatically, and the vehicle may manage its low-voltage electrical system differently from a conventional car. Follow the manufacturer’s instructions for accessory power and charging equipment. Do not assume that the engine must run continuously or that a stationary vehicle will behave the same way as a conventional vehicle.
24V vehicles: Confirm that the charging equipment explicitly supports the vehicle’s system voltage and that the power station accepts the resulting charging input. A charger or cable intended only for a 12V system should not be connected to a 24V source unless the equipment’s specifications expressly permit it.
Across all three vehicle types, check the specifications of the complete charging setup rather than relying on the vehicle category alone. Compatibility with one vehicle does not establish compatibility with every model in that category.
If the vehicle manual or charger documentation does not clearly confirm that the intended setup is supported, consult the manufacturer before connecting the equipment.
Why Is Your Power Station Charging Slowly from the Car?
If your portable power station charges more slowly than expected while driving, the cause may be a power limit somewhere in the charging setup. The vehicle outlet, cable, charging device, and power station all affect the amount of power that reaches the battery.
Before replacing equipment, check the actual charging input if your power station displays it. Compare that reading with the limits specified for your vehicle and charging method. A lower-than-expected reading does not automatically mean something is faulty; it may simply reflect the maximum power the setup can provide.
The Car Outlet or Power Station Limits Input Power
Possible cause: The vehicle’s 12V accessory outlet cannot supply as much power as the power station could accept, or the station has a lower maximum car-charging input than expected.
For example, a power station may support a higher charging rate through a dedicated alternator charger but accept considerably less power through its standard DC car input. The vehicle outlet may impose an additional limit.
What to check:
The outlet’s voltage, current rating, and operating restrictions in the vehicle manual.
The power station’s maximum supported input power for the specific charging method.
The charging device’s output rating and any applicable compatibility limits.
The actual input wattage shown on the power station’s display, if available.
What to do: If the equipment is operating within its specified limits, the lower charging rate may be normal. If you need more power, consider a compatible charging method designed to provide it, such as a dedicated alternator charger, provided the vehicle and power station support that setup.
Never exceed the outlet’s rating or bypass its protective devices to increase charging power.
The Cable or Connector Is Restricting Charging
Possible cause: The cable may be unsuitable for the intended current, a connector may be loose or damaged, or the connection may have developed excessive resistance. Some charging systems may also limit power when they detect a connection or voltage problem.
What to check:
Whether the cable is specified for your charging equipment and intended current.
Whether the plugs fit securely and the connectors show signs of wear or damage.
Whether the power station reports an input error or repeatedly starts and stops charging.
Whether the plug or connector becomes excessively hot during use.
What to do: If the cable is undamaged but not suitable for the required current, replace it with one that meets the equipment manufacturer’s specifications. If the connection is loose, damaged, discolored, or excessively hot, stop charging and discontinue use until the problem has been identified.
Do not force a connector into a port, modify the plug, or bypass a protection feature. If overheating persists with a correctly specified cable, have the outlet or charging equipment inspected.
Other Devices Are Using Power at the Same Time
Possible cause: Other electrical loads may be competing for available power or reducing the energy that remains stored in the station.
The effect depends on how the equipment is connected. Devices powered directly from the vehicle can increase the total demand on the vehicle’s electrical system. Devices powered by the power station consume stored energy, so the battery may gain charge more slowly—or its displayed charge level may barely increase—even while charging continues.
If you need to estimate how much energy connected appliances use, our guide to calculating power consumption explains how to work out energy use from power ratings and operating time.
What to check:
Whether other accessories are drawing power from the same vehicle circuit.
Whether the power station is simultaneously powering appliances or charging other devices.
Whether the displayed charging input is stable and whether the battery’s charge level is increasing over time.
What to do: If practical, turn off nonessential loads temporarily and observe whether the charging input or battery charge level changes. Avoid overloading a vehicle circuit by adding more devices to the same outlet or using unapproved adapters.
Remember that input power and net battery gain are not necessarily the same. If the station is charging while supplying power to connected devices, some of the incoming energy may be used immediately rather than stored.
Vehicle Conditions or Battery State Affect Charging
Possible cause: The vehicle’s operating mode, available electrical output, or the power station’s own charging behavior may cause the input power to vary. Some vehicles manage accessory power differently depending on their operating state, while some power stations reduce charging power as the battery approaches full capacity.
Temperature can also affect charging. A power station may limit its charging rate when the battery is too cold or too hot, depending on its battery chemistry and built-in controls.
What to check:
Whether the vehicle is operating in the mode required by the charging equipment.
Whether the vehicle or power station displays an electrical or temperature warning.
Whether charging slows mainly when the battery is nearly full.
Whether the station’s manual specifies temperature limits or other conditions that restrict charging.
What to do: Follow the vehicle and power station manuals for the required operating conditions. If a temperature warning appears, stop or allow charging to pause as directed by the manufacturer; do not try to override the battery’s protection system. If charging remains unusually slow or repeatedly stops despite compatible equipment and suitable conditions, consult the manufacturer’s troubleshooting guidance.
A changing input reading is not necessarily evidence of a fault. The useful question is whether the charging rate is consistent with the limits and operating conditions of your particular setup.
Common Mistakes When Charging a Power Station While Driving
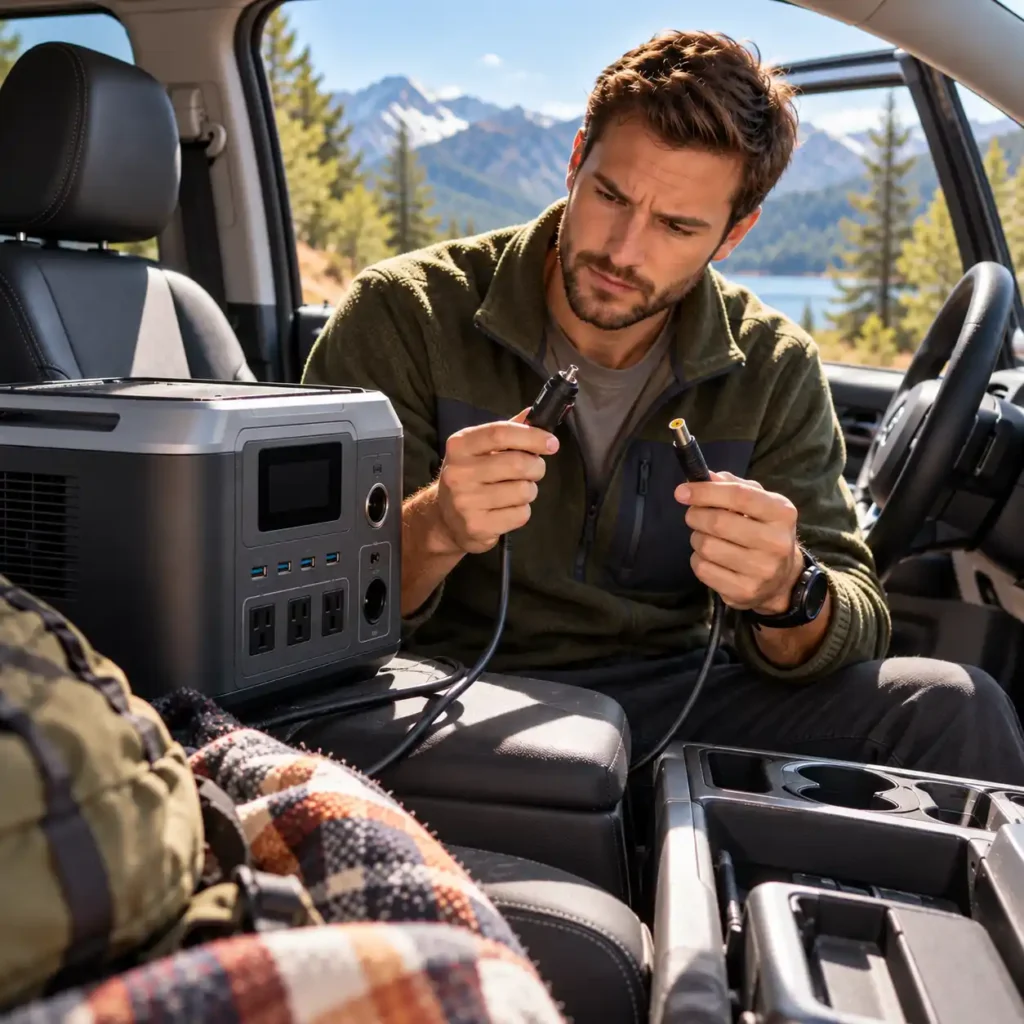
Choosing the wrong charging setup can lead to slower charging, unnecessary equipment costs, or avoidable electrical problems. Keep these common mistakes in mind before connecting your power station to your vehicle.
Confusing a 12V Output with a Charging Input
A power station’s 12V DC output supplies power to compatible devices; it is not designed to charge the station itself. To recharge the battery from a vehicle, use the designated DC, car, or vehicle charging input supported by your model and the correct cable or charging device.
Do not assume that a port is suitable for charging just because it is labeled 12V or accepts a particular connector. Check the manufacturer’s specifications for the supported input voltage, current, connector type, polarity, and maximum charging power. A connector that fits physically does not guarantee electrical compatibility, and using the wrong port or an incompatible power source can prevent charging or damage equipment.
Assuming the Advertised Charger Wattage Is Guaranteed
A charger’s maximum rated power does not guarantee that your power station will receive that amount throughout the drive. A standard 12V accessory outlet is typically limited by the vehicle’s outlet and circuit ratings, while a dedicated alternator charger may support higher input power through a properly designed and installed connection. Actual charging power depends on the vehicle’s electrical system, the charger, the wiring, and the power station’s input limit.
Do not assume that an alternator charger will deliver its advertised maximum in every vehicle or with every power station. Check the supported specifications of the complete setup before estimating charging time.
Using an Inverter Through the Same Limited 12V Socket to Get More Power
Adding an inverter to a standard 12V accessory outlet does not remove the outlet’s power limit. It also introduces conversion losses, so the station may receive less energy than expected. If you regularly need more charging power than the outlet can provide, consider a compatible alternator-charging system instead.
Connecting Equipment Without Checking Voltage and Current Limits
A cable, charger, or adapter that physically fits is not necessarily electrically compatible. Check the supported voltage, current, connector type, and maximum input power for every part of the setup. Never connect a 24V supply to an input rated only for 12V.
Ignoring Heat, Vibration, or the Vehicle’s Fuse Rating
A loose plug or poorly secured cable can become a problem during a long drive. Excessive heat, damaged insulation, or an unsuitable fuse rating can create electrical and fire risks. Use properly rated equipment, secure connections against movement, and never replace a fuse with a higher-rated one to force more power through a circuit.
Practical buying priorities: Before purchasing a car-charging cable or alternator charger, confirm compatibility with your power station and vehicle, check the supported input power and current limits, and consider how much energy you need to add during a typical drive. For occasional top-ups, a compatible 12V cable may be sufficient; for frequent travel or higher charging demands, a properly installed alternator charger may be a better long-term investment.
Is Car Charging Enough, or Do You Need an Alternator Charger?
The right charging setup depends on how much energy you use, how much driving time you have, and how often you need to recharge on the road. For occasional top-ups, a standard 12V car outlet may be enough. If you regularly need to replenish a large power station during shorter drives, a compatible alternator charger may be worth the additional cost.
A standard 12V car outlet is generally better suited to gradual charging during longer drives. A dedicated alternator charger can deliver substantially higher charging power when the vehicle, wiring, charger, and power station support it, making it a better option when you need to replenish more battery capacity in less time.
Frequently Asked Questions
Can I use a portable power station while it is charging from my car?
Yes, if the power station supports simultaneous charging and discharging, often called pass-through charging. However, the connected devices may consume energy as quickly as, or faster than, the car supplies it. Check the manufacturer’s instructions and monitor the battery level if you plan to run a refrigerator or other continuous load.
Can I charge a portable power station from a 24V truck outlet?
Only if the power station’s vehicle-charging input and the charging cable are explicitly compatible with 24V. Do not assume that a cable designed for a standard 12V car outlet will work with a truck’s 24V system. Check the input voltage range in the manual before connecting anything
Can I charge a portable power station from an electric vehicle while driving?
Potentially, yes, but it depends on the EV’s available power outlets, their output limits, and the power station’s supported charging input. A conventional 12V accessory outlet may provide only limited charging power. Check the vehicle manual to confirm which outlets can be used while driving and whether their power supply is suitable for your equipment.
Does every portable power station come with a car charging cable?
No. Included accessories vary by model, and some manufacturers sell compatible car-charging cables or adapters separately. Before purchasing a station or additional cable, check the product’s included-accessories list and confirm that the cable matches the station’s charging input.
Can I leave my power station connected to the car when the engine is off?
It is safer to disconnect it when you stop unless the vehicle and charging system are specifically designed to support charging in that condition. Some accessory outlets remain powered with the ignition off, which can drain the starter battery. Follow the vehicle and charger manuals rather than assuming the outlet automatically switches off.
Can I charge a portable power station from a car if I only have a few hours to drive?
Yes, but treat the result as a top-up rather than assuming you can fully recharge the battery. The energy added depends on the actual charging input, driving time, and conversion losses. If you regularly need to replenish a substantial amount of capacity during short journeys, a compatible alternator charger may be more suitable than a standard 12V outlet.
Final Takeaway: Choose the Charging Method That Fits Your Drive
The best way to charge a portable power station from your car while driving depends on your equipment, your vehicle, and how much energy you need to replenish during the journey.
Start by checking compatibility: confirm that your power station supports the charging method, and verify the vehicle outlet’s voltage and power limits. Next, estimate how much energy you can realistically add during your usual driving time. Use that estimate to decide whether a standard 12V car outlet is sufficient or whether a dedicated alternator charger better fits your needs.
Finally, check the cable and connector requirements, follow the manufacturers’ instructions, and make sure the setup can be used safely in your vehicle.
The practical rule is simple: verify compatibility and power limits first, calculate the energy you need second, and choose the simplest safe charging method that meets your requirements.