
A portable power station not charging from solar panels may have a connection problem, incompatible equipment, insufficient sunlight, or an input limitation that prevents charging. In some cases, the station detects the solar panels but receives too little power to charge the battery effectively. The first step is to determine whether solar input is completely absent or simply lower than expected.
If your power station shows 0 W of solar input, start by checking the cable connections, connectors, panel compatibility, and charging status. If it displays some input power but the battery charges very slowly or the wattage fluctuates, sunlight, partial shading, panel orientation, or the station’s charging limits may be responsible.
This guide explains how to identify the cause, perform basic checks safely, and determine whether the problem comes from the solar panels, the charging cable, or the power station itself.
Table of Contents
Quick Answer: Why Is Your Power Station Not Charging from Solar Panels?
A portable power station may not charge from solar panels for several reasons:
No solar input (0 W): A loose connection, incompatible cable, incorrect polarity, insufficient input voltage, or a panel configuration outside the station’s supported limits may prevent charging.
Low or fluctuating input power: Cloud cover, partial shade, poor panel positioning, or changing sunlight conditions can reduce the power reaching the station.
Voltage or current incompatibility: The solar array may fall outside the power station’s supported input range, even if the connectors fit.
Charging restrictions or warnings: Battery temperature, a full battery, charging settings, or a protection warning may limit or stop charging.
Possible equipment fault: A damaged cable, defective panel, or problem with the station’s solar input may be responsible if basic checks do not resolve the issue.
What to Check First
Follow this sequence before replacing any equipment:
Check the display. Determine whether the solar input reads 0 W, shows low or fluctuating wattage, or displays an error.
Confirm the correct input port. Make sure the solar charging cable is connected to the designated solar or PV input specified in your power station’s manual. Do not assume that a DC port is a solar input simply because the connector fits.
Inspect the connections. Make sure the cable and adapters are firmly connected, undamaged, and approved for the equipment.
Check the sunlight. Position the panels in unobstructed sunlight and look for partial shading.
Verify compatibility. Compare the solar panel’s electrical specifications with the power station’s supported solar input limits.
Check the station. Review its battery status, temperature warnings, charging settings, and troubleshooting instructions.
Important safety warning: Never connect a solar panel to a power station without first verifying compatibility and checking the station’s maximum permitted solar input voltage. Exceeding that voltage can damage the equipment. A connector that fits does not guarantee electrical compatibility.
If these initial checks do not identify the cause, the next step is to diagnose the problem according to the input reading and inspect the relevant components in a systematic order.
| Symptom | Likely Cause | Safe Check | Next Step |
|---|---|---|---|
| Solar input shows 0 W | Connection, compatibility, voltage, or charging restriction | Check the display, cable, and documented input limits | Follow the relevant diagnostic section |
| Input is low or fluctuating | Sunlight, shade, positioning, or operating conditions | Observe input under stable, unobstructed sunlight | Check compatibility if output remains low |
| Error or warning appears | Model-specific input or protection condition | Record the exact code and consult the manual | Follow the documented procedure |
| One panel works, but the full array does not | Configuration or input-limit issue | Verify combined voltage, current, and power | Recheck the supported wiring arrangement |
| AC charging works, solar charging does not | Solar-specific connection or input issue | Check the PV cable, panel compatibility, and warnings | Follow the solar troubleshooting procedure |
Why Is Your Portable Power Station Not Charging from Solar Panels?
Before replacing a solar panel or buying a new cable, check what your portable power station reports about its solar input. The display can help you narrow down the problem, but a single reading rarely identifies the exact cause. A reading of 0 W, fluctuating input power, or an error message can each result from several different conditions.
Start by checking the station’s display while the solar panel is connected according to the manufacturer’s instructions. Note the solar input wattage, any voltage or current readings the station provides, the battery percentage, and any warning indicators. Then use the symptoms below to decide which checks to perform next.
Solar Input Shows 0 W
If the display shows 0 W, the power station is not reporting measurable solar charging input at that moment. This does not necessarily mean the panel is defective. The cause could be a loose connection, an incompatible cable or adapter, an unsuitable panel configuration, insufficient input voltage, or a charging restriction.
Begin with these checks:
Inspect the connections. Confirm that the cable is fully seated at both ends and that the connectors and cable are undamaged.
Verify compatibility. Check that the panel, cable, and adapters are supported by your specific power station.
Check the electrical specifications. Compare the panel’s output voltage with the station’s permitted solar input range. Also review any applicable input-current limits.
Review the charging status. Check whether the battery is already full, a charging limit is active, or the station displays a warning that could explain why charging has stopped.
If the display continues to show 0 W, do not immediately conclude that the solar panel has failed. Continue with the connection and compatibility checks in the following sections before testing individual components.
Solar Input Is Low or Keeps Fluctuating
If your power station detects solar input but the wattage remains low or changes repeatedly, the problem may be related to sunlight, panel positioning, electrical operating conditions, or an unstable connection.
Check the following factors:
Sunlight and panel position: Clouds, weak sunlight, and an angle that does not capture the available sunlight effectively can reduce solar output.
Partial shading: A shadow across part of a panel can significantly affect its output, depending on the panel’s design and the shaded area.
Operating voltage: The panel may produce voltage but operate outside the conditions needed for the power station to accept or convert its available power effectively.
Connection stability: A loose connector, damaged cable, or unreliable adapter can interrupt input or cause inconsistent readings.
Station input limits: The power station may limit the power it accepts even when the panels could produce more under the prevailing conditions.
Solar output naturally changes with sunlight, so some variation is normal. However, persistent fluctuations under stable conditions may justify a closer inspection of the connections and panel configuration.
To narrow down the cause, observe the input reading after positioning the panels in unobstructed sunlight and checking the connections. If the wattage remains unexpectedly low, compare the panel specifications with the power station’s input requirements. The later sections explain how to assess these factors in more detail.
Solar Input Is Available, but the Battery Percentage Does Not Increase
If your power station shows solar input in watts but the battery percentage stays the same, the station may be using most of the incoming power to run connected devices. In this situation, solar charging can be working even though the battery is not gaining a noticeable amount of charge.
What to check:
Compare the solar input wattage with the power consumption shown on the station’s display, if available.
Temporarily disconnect nonessential devices and check whether the battery percentage begins to increase.
Allow enough time for a measurable change. Small differences in charging and power consumption may not immediately appear in the displayed battery percentage.
If the battery begins charging faster after you disconnect the loads, the solar input may be functioning normally. If the battery percentage still does not increase, continue with the voltage, compatibility, temperature, and error-code checks below.
The Power Station Displays an Error or Warning
If your power station displays an error code, warning symbol, or charging message, record the exact wording or code before changing the setup. The message may relate to input voltage, temperature, a connection problem, or another condition, but its meaning depends on the specific model.
Use this procedure:
Record the message. Note the exact error code, warning text, and any accompanying input readings.
Identify the model. Find the full model name and, if relevant, the hardware version shown on the unit or in its documentation.
Consult the official manual. Use the manufacturer’s troubleshooting instructions to interpret the message and identify the recommended response.
Follow the stated procedure. Disconnect or reconnect equipment, adjust the setup, or allow the station to return to an acceptable operating temperature only as directed by the manufacturer.
Contact support if necessary. If the warning persists, the instructions are unclear, or the unit appears damaged, stop troubleshooting and contact the manufacturer.
Do not assume that an error code has the same meaning across different brands or models. Avoid repeatedly resetting the station or reconnecting the panels without understanding the warning, especially if it may indicate an input-voltage or temperature problem.
The key takeaway: Use the display to identify the type of symptom, not to guess a single cause. Once you know whether the input is absent, unusually low, unstable, or accompanied by a warning, you can investigate the relevant connections, electrical limits, environmental conditions, and charging settings systematically.
Check the Solar Charging Cable, Connectors, and Polarity
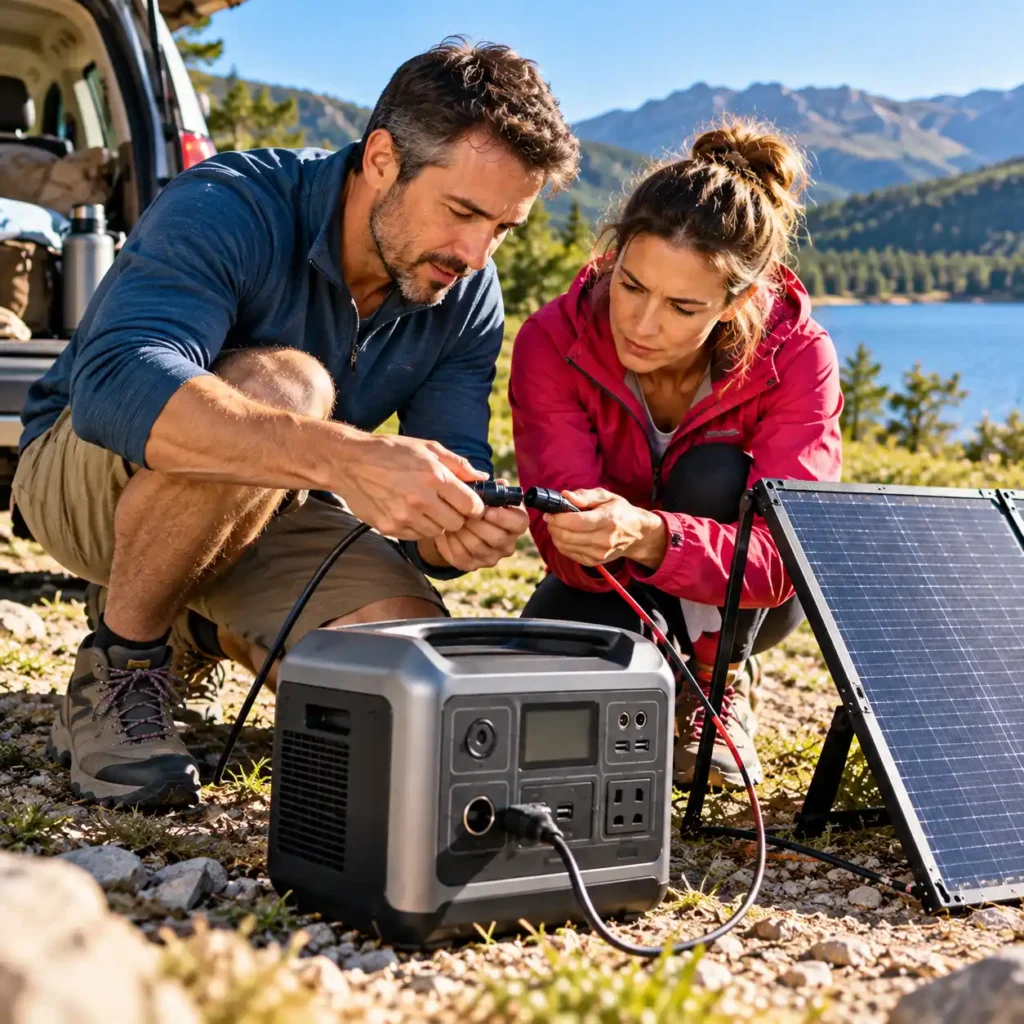
A loose connection, damaged cable, or incompatible adapter can prevent a portable power station from charging from solar panels, even when the panels are receiving plenty of sunlight. In some cases, the connectors appear to fit correctly, but the cable assembly still does not provide the electrical connection the station requires.
Start by inspecting the entire connection path, from the solar panel’s output cable to the power station’s solar input. Check the cable, any extension leads or adapters, and the connectors at both ends. Before disconnecting or reconnecting anything, follow the manufacturer’s instructions for safely isolating the solar input.
Check the Cable, Adapter, and Input Connector
A solar charging cable must provide a secure connection and be electrically compatible with both the panel and the power station. First, confirm that the cable is connected to the designated solar input port, as specified in the manual for your exact power station model. A problem anywhere along the connection path can interrupt charging or prevent the station from detecting the solar input.
Check these potential issues first:
Loose connections: A connector that is not fully seated may interrupt the electrical connection. Inspect both ends and check that each connector is secured according to the manufacturer’s instructions. Never force a connector into place.
Damaged cables: Look for cuts, crushed sections, exposed conductors, melted insulation, bent contacts, or other visible damage. Stop using a cable if you find damage rather than attempting to repair it while connected to the solar panel or power station.
Incompatible adapters: An adapter may physically connect two different plugs without providing the electrical configuration required by the equipment. Confirm that the adapter is specifically suitable for the intended solar charging setup.
Incorrect connector type or pinout: Some connectors can look similar while using different contact arrangements or electrical connections. Verify the connector specification and wiring configuration rather than relying on appearance alone.
Unreliable extension leads: If the setup includes an extension cable, inspect its connections and confirm that it is suitable for the system’s voltage and current. A damaged or unsuitable extension can introduce additional connection problems.
If the cable and connectors appear undamaged, check the manufacturer’s documentation for the approved cable and adapter configuration. For a broader overview of compatible equipment, see our guide to portable power station accessories.
Where practical, use a known-compatible cable specified for your power station instead of introducing additional adapters.
Do not repeatedly wiggle a connected cable to make charging start. If moving a connector causes the input reading to change, that may indicate an intermittent connection, but it does not identify the faulty component with certainty. Isolate the equipment safely and inspect the connection before testing further.
How Incorrect Polarity Can Prevent Solar Charging
Solar panels provide direct-current (DC) electricity, which has positive and negative electrical conductors. Polarity describes which conductor is positive and which is negative. For a compatible solar charging connection, the positive and negative conductors must reach the corresponding input terminals as specified by the power station manufacturer.
If a cable or adapter reverses these connections, the station may fail to accept the input or may trigger a protective response. The exact behavior depends on the design of the station and its input protection. Do not assume that reverse polarity is harmless simply because the display shows 0 W.
To check polarity safely:
Read the equipment markings. Look for positive (+) and negative (−) symbols on the panel, cable, adapter, and power station documentation.
Verify the cable configuration. Check the manufacturer’s wiring diagram or connector specification, especially if an adapter or third-party cable is involved.
Check the stated polarity at the input. Confirm that the cable assembly delivers the polarity required by the power station, rather than assuming that matching connectors guarantee correct wiring.
Use electrical test equipment only if appropriate. If the documentation does not establish the polarity, a person competent to use a suitable multimeter can check the panel output and cable configuration. Follow the instrument’s instructions and the equipment manufacturer’s safety guidance.
Do not open the power station, probe unfamiliar connector contacts, or improvise test leads to investigate a suspected polarity problem. Solar panels can produce voltage whenever they receive light, and an incorrectly configured connection can create a risk of equipment damage or electrical injury. If the connector pinout is unclear, obtain a manufacturer-approved cable or ask qualified support to verify the setup.
Also, do not confuse polarity with voltage compatibility. A cable can have the correct positive and negative connections while still delivering a voltage that falls outside the station’s permitted input range. Both conditions must be checked independently.
Why a Connector That Fits May Still Be Incompatible
A connector that fits into the solar input is not necessarily electrically compatible with the power station. Physical fit only indicates that the connector can mate with the port; it does not prove that the voltage, polarity, pinout, or current capacity is correct.
This distinction matters when using third-party solar panels, extension leads, or adapters. Two connectors may have similar dimensions but differ in their internal contact arrangement or intended electrical use. An adapter may also change the connector shape without resolving an underlying electrical mismatch.
Before using a cable or adapter, verify four things:
Connector specification: The plug must be the correct type for the station’s input, not merely similar in appearance.
Polarity and pinout: The positive and negative conductors must be connected as required by the manufacturer.
Voltage compatibility: The panel or array must remain within the station’s permitted solar input voltage range under the relevant operating conditions.
Current and power limits: The cable, adapter, and station must be suitable for the current and power involved. The station’s input limits still apply even when the panel’s advertised wattage appears appropriate.
For example, a third-party solar panel may come with a connector that fits an adapter supplied for another setup. That physical connection does not establish that the panel’s output voltage and polarity match the power station’s requirements. The combination should not be used until the complete electrical configuration has been verified.
If you cannot confirm the connector specification or wiring arrangement, do not experiment with adapters. Consult the manuals for the exact panel and station models or use a cable explicitly approved for the intended connection.
The practical takeaway: Inspect the cable path, verify polarity, and confirm the connector’s electrical configuration before moving on to more complex troubleshooting. If the connections are secure and compatible but the station still does not accept solar input, the next step is to check whether the panel’s voltage falls within the power station’s supported limits.
Check Solar Panel Voltage Against Your Power Station's PV Input Limits
A solar panel can be compatible with your portable power station’s connector and still fail to charge the battery because its voltage falls outside the station’s supported solar input range. If the voltage is too low, the station may not start charging. If it exceeds the maximum permitted input voltage, it can damage the station’s charging electronics.
To diagnose this problem, compare the solar panel’s electrical specifications with the PV input requirements in your power station’s manual. Pay particular attention to the panel’s open-circuit voltage (Voc), its operating voltage at maximum power (Vmp), and the station’s minimum and maximum PV input voltage.
Do not rely on the panel’s advertised wattage alone. A panel rated at a suitable number of watts may still be electrically incompatible with your power station.
For an example of manufacturer-specific compatibility requirements, see Jackery’s solar panel compatibility guidance, which explains how to check connector types, open-circuit voltage, and input current limits.
Voc vs. Vmp: Which Voltage Matters?
Solar panels have several voltage ratings, and two of the most important are Voc (open-circuit voltage) and Vmp (voltage at maximum power). Although both describe the panel’s voltage, they refer to different operating conditions.
Voc: Open-Circuit Voltage
Voc is the voltage measured across a solar panel’s output terminals when the panel is illuminated but no load is drawing current. Manufacturers typically list this value on the panel’s specification label or datasheet.
Voc is particularly important when checking the maximum permitted PV input voltage of a power station. Before connecting a panel, you need to ensure that its open-circuit voltage, including any increase caused by low temperatures, does not exceed the station’s maximum input limit.
Vmp: Voltage at Maximum Power
Vmp is the voltage at which the panel produces its rated maximum power under specified test conditions. It describes the panel’s operating voltage at its maximum power point, rather than its voltage when no current is flowing.
Vmp helps you assess whether the panel can operate within the power station’s supported charging range. If the panel’s operating voltage is below the station’s minimum required input voltage, the station may not begin charging or may fail to maintain charging under some conditions.
PV Input Voltage Range
The PV input voltage range is the voltage range within which the power station is designed to accept solar input. The manufacturer’s specifications may state a minimum input voltage and a maximum input voltage, and some models also specify a separate operating or MPPT voltage range.
These limits are model-specific. A panel that works with one power station may not work with another, even if both have similar battery capacities or advertised charging wattages.
Use the following table to identify the specifications that matter most when diagnosing a solar charging problem.
| Parameter | What It Means | What to Check |
|---|---|---|
| Voc | Panel voltage with no load | Confirm that the panel's open-circuit voltage, including the cold-weather increase, stays below the station's maximum permitted PV input voltage. |
| Vmp | Panel voltage at maximum power | Check whether the panel's operating voltage is suitable for the station's supported charging range. |
| Minimum PV input voltage | Lowest voltage at which the station can accept or start solar charging, as specified by the manufacturer | Check whether the panel can provide sufficient voltage under the prevailing conditions. |
| Maximum PV input voltage | Highest permitted voltage at the station's solar input | Ensure the panel or array cannot exceed this limit under the expected operating conditions. |
| MPPT operating range | Voltage range within which the station's maximum power point tracking system can operate, where specified | Compare the panel's expected operating voltage with the documented range. |
If the panel’s specifications or the station’s input requirements are unclear, consult the official documentation before reconnecting the equipment. Do not guess the limits from the connector type, battery capacity, or charging wattage.
What Happens When Solar Input Voltage Is Too Low?
A solar panel can produce measurable voltage without providing enough voltage for a portable power station to start or sustain charging. This is one reason a panel may appear to be working while the station continues to display 0 W.
The station’s solar charging electronics must operate within their supported input conditions. If the voltage available from the panel is below the required starting threshold, the station may not recognize a usable solar input. If the voltage is close to the lower limit, charging may be inconsistent as sunlight and panel output change.
Several conditions can contribute to insufficient input voltage:
The panel is unsuitable for the station. Its operating voltage may be below the station’s minimum supported input voltage.
Sunlight is insufficient. Cloud cover or other conditions can reduce the panel’s available output and affect its ability to maintain suitable operating conditions.
The panel is operating outside its expected conditions. Actual voltage and power depend on the panel, irradiance, temperature, and electrical load.
The connection introduces a problem. An incompatible cable or adapter may prevent the station from receiving the expected input, even when the panel itself is suitable.
Do not assume that every low-input problem is caused by voltage alone. Solar input wattage depends on both voltage and current, and the station’s charging behavior also depends on its control system and operating conditions.
To investigate a possible low-voltage problem, compare the panel’s Vmp with the station’s documented minimum and operating voltage requirements. Then check the displayed input reading under good sunlight and verify that the cable and connectors are compatible.
If the panel’s operating voltage is below the required range, improving its position in the sun may not solve the underlying compatibility problem. You may need a different supported panel configuration. Check the manufacturer’s instructions before changing the configuration or connecting additional panels.
Why Exceeding the Maximum PV Voltage Is Dangerous
The solar array’s open-circuit voltage (Voc) must remain within the power station’s maximum permitted PV input voltage. In a series-connected array, the panels’ Voc values add together. Because solar panel Voc increases as cell temperature falls, the array’s voltage under cold conditions can be higher than its rating under standard test conditions.
Check the panel specifications and the power station manufacturer’s instructions before connecting the array. Account for the expected minimum temperature using the panel manufacturer’s temperature coefficient or other specified calculation method. Do not connect an array if its calculated cold-weather Voc could exceed the station’s maximum PV input voltage. Exceeding this limit can damage the solar input; do not assume the station’s protection circuitry will make an incompatible array safe.
How Cold Weather Can Increase Solar Panel Voc
Solar panel open-circuit voltage generally rises as the solar cells become colder. This matters when checking compatibility because a panel that appears to be within a power station’s maximum input voltage under mild conditions may produce a higher Voc on a cold morning.
The size of this increase depends on the specific panel. Manufacturers commonly provide a temperature coefficient for Voc in the datasheet. That coefficient can be used with the panel’s rated Voc to estimate how its open-circuit voltage changes as cell temperature decreases.
When checking a multi-panel configuration, consider the coldest expected conditions rather than using only the temperature at the time of installation. If panels are connected in series, their open-circuit voltages add together, so the cold-weather increase affects the combined array voltage as well.
For a compatibility check, follow this sequence:
Find the panel’s rated Voc and its Voc temperature coefficient in the manufacturer’s datasheet.
Determine the lowest expected cell temperature for the installation conditions, using an appropriate method specified by the manufacturer or applicable design guidance.
Account for the resulting increase in Voc.
For panels connected in series, calculate the combined open-circuit voltage using the adjusted voltage values.
Compare the result with the power station’s maximum permitted PV input voltage.
If the panel datasheet does not provide the information needed to assess the cold-weather voltage, do not assume that the rated Voc will remain unchanged. Obtain the missing specifications or seek qualified guidance before connecting the array.
This check is particularly important when combining multiple panels. A configuration may charge successfully in warm weather yet exceed the station’s voltage limit when the panels are cold.
The practical takeaway: Confirm that the panel’s operating voltage is suitable for starting and maintaining solar charging, and that its maximum possible open-circuit voltage remains within the station’s permitted input limit. Check cold-weather conditions before connecting multiple panels. If the voltage specifications are incompatible or uncertain, do not connect the panel until the setup has been verified.
Check Series and Parallel Solar Panel Connections
If your portable power station is not charging from solar panels, or its input reading seems inconsistent with the panel specifications, check how the panels are connected. A solar array made from multiple panels can exceed the station’s permitted voltage or current limits even when each panel is individually compatible.
The two common configurations are series and parallel. They affect the array’s electrical output differently, so the same panels can present different compatibility issues depending on how they are connected.
Series connections increase voltage, while parallel connections increase current. Before reconnecting or expanding an existing array, verify that its combined electrical characteristics remain within the limits specified for your exact power station.
Series Connections
In a series configuration, the positive terminal of one panel connects to the negative terminal of the next. The panel voltages add together, while the current through the series string is limited by the current available from the string’s panels under the prevailing conditions.
For example, connecting two identical panels in series approximately doubles their open-circuit voltage compared with one panel. This can help a system reach the minimum voltage required for solar charging, but it can also push the combined voltage above the power station’s maximum permitted PV input voltage.
When checking a series-connected array, focus on these points:
Combined open-circuit voltage (Voc): Add the panels’ Voc values to estimate the string’s open-circuit voltage under the specified reference conditions.
Cold-weather voltage: Account for the increase in Voc as solar cells become colder. The combined voltage must remain below the station’s maximum permitted input voltage under the expected conditions.
Current compatibility: Series connection does not eliminate current limits. Check the string’s expected current against the station’s permitted input current and the panel configuration requirements.
Manufacturer restrictions: Confirm that the station supports the intended series configuration and that the panels and cables are suitable for it.
Do not assume that two panels can safely be connected in series simply because each panel’s individual Voc is below the station’s maximum input voltage. The combined string voltage is what matters.
Parallel Connections
In a parallel configuration, the positive terminals of the panels are connected together, and the negative terminals are connected together using suitable equipment. The array voltage remains approximately the same as that of an individual panel under comparable conditions, while the available current can increase.
For example, connecting two compatible panels in parallel can approximately double the available current compared with one panel under similar operating conditions. This may increase the power available to the station, but it can also exceed the station’s permitted solar input current.
When checking a parallel-connected array, review the following:
Combined current: Determine the expected current from the parallel array using the panel specifications and the intended configuration.
Maximum input current: Compare the array’s current characteristics with the station’s documented PV input current limit.
Voltage compatibility: Confirm that the panel voltage remains within the station’s supported range. Parallel wiring does not remove the need to check Voc and operating voltage.
Approved configuration: Check whether the manufacturer permits the intended number of parallel panels and specifies requirements for connectors, cables, or protective devices.
Do not assume that an array is compatible merely because its voltage falls within the station’s permitted range. The station may have a separate maximum input-current limit, and the complete configuration must satisfy both voltage and current requirements.
Also, the current available from an array and the current the station actually accepts are not necessarily the same. Depending on the station’s charging electronics, operating conditions, and input limits, the station may restrict the current it draws. That behavior should not be treated as permission to connect an array that violates the manufacturer’s specifications.
How to Check the Combined Array Against the Station’s Limits
Before troubleshooting an existing multi-panel setup, compare the actual configuration with the electrical specifications of the panels and the power station. Do not rely on the number of panels or their combined advertised wattage alone.
Use this checklist:
Identify the exact power station model. Find the manufacturer’s documented minimum and maximum PV input voltage, maximum input current, maximum solar input power, and any separate MPPT operating range or configuration restrictions.
Identify the panel specifications. Check each panel’s Voc, Vmp, short-circuit current (Isc), operating current at maximum power (Imp), and relevant temperature coefficients in the manufacturer’s datasheet.
Confirm the wiring configuration. Establish whether the panels are connected in series, in parallel, or through a manufacturer-supported combination of both.
Check the combined voltage. For series-connected panels, account for the sum of their Voc values and the increase in voltage under cold conditions. For parallel-connected panels, verify that the resulting voltage is suitable for the station.
Check the current limits. For parallel configurations, assess the combined current against the station’s permitted input current. In a series configuration, the string current is generally limited by the current available from its panels under the prevailing conditions. Also check applicable cable, connector, and panel configuration limits. Follow the manufacturer’s permitted wiring configurations. Do not assume that an array is compatible simply because its voltage is within range.
Check the Maximum Solar Input Power Separately
A solar array must also comply with the power station’s maximum supported solar input power. Compare the array’s rated power with the station’s stated PV input rating, and check whether the manufacturer specifies additional limits for individual inputs, ports, or supported array configurations.
A station may accept a panel or array with a higher rated wattage only when that combination is explicitly permitted by the manufacturer. Depending on the model, excess available panel power may be limited by the charging system, but this does not establish that every higher-wattage array is compatible. Voltage and current must still remain within their permitted limits, and the specified wiring configuration must be supported.
Do not use the station’s wattage rating alone to determine compatibility. Check maximum PV voltage, allowable input current, maximum solar input power, and supported connections as separate requirements.
Verify the manufacturer’s instructions. Make sure the station supports the proposed configuration and that all connections, adapters, and protective components meet the manufacturer’s requirements.
The following distinctions are important when interpreting the specifications:
| Parameter | What It Tells You | What to Verify |
|---|---|---|
| Voltage (V) | Electrical potential at the input | The array's voltage must remain within the station's permitted range, including the maximum cold-weather Voc. |
| Current (A) | Electrical current available from or accepted by the input | The configuration must comply with the station's current limit and the requirements for the connected panels and wiring. |
| Power (W) | The rate at which electrical energy can be produced or accepted | The array's available power must be compatible with the station's maximum solar input power. |
| Wiring configuration | How panel voltages and currents combine | Confirm that the manufacturer supports the intended series or parallel arrangement. |
Series and parallel connections are not interchangeable in every system. A configuration that is suitable for one power station may be incompatible with another because their voltage ranges, current limits, and supported panel arrangements differ.
If the existing array exceeds any documented limit, do not reconnect it to see whether the station will start charging. If you cannot verify the electrical characteristics of the array, consult the manufacturer’s documentation or qualified support before making changes.
The practical takeaway: Diagnose the array as a complete electrical configuration, not as a collection of individually compatible panels. Check combined voltage, current, and power separately, account for expected operating conditions, and confirm that the exact power station supports the intended wiring arrangement before connecting it.
Check Sunlight, Shade, and Solar Panel Position
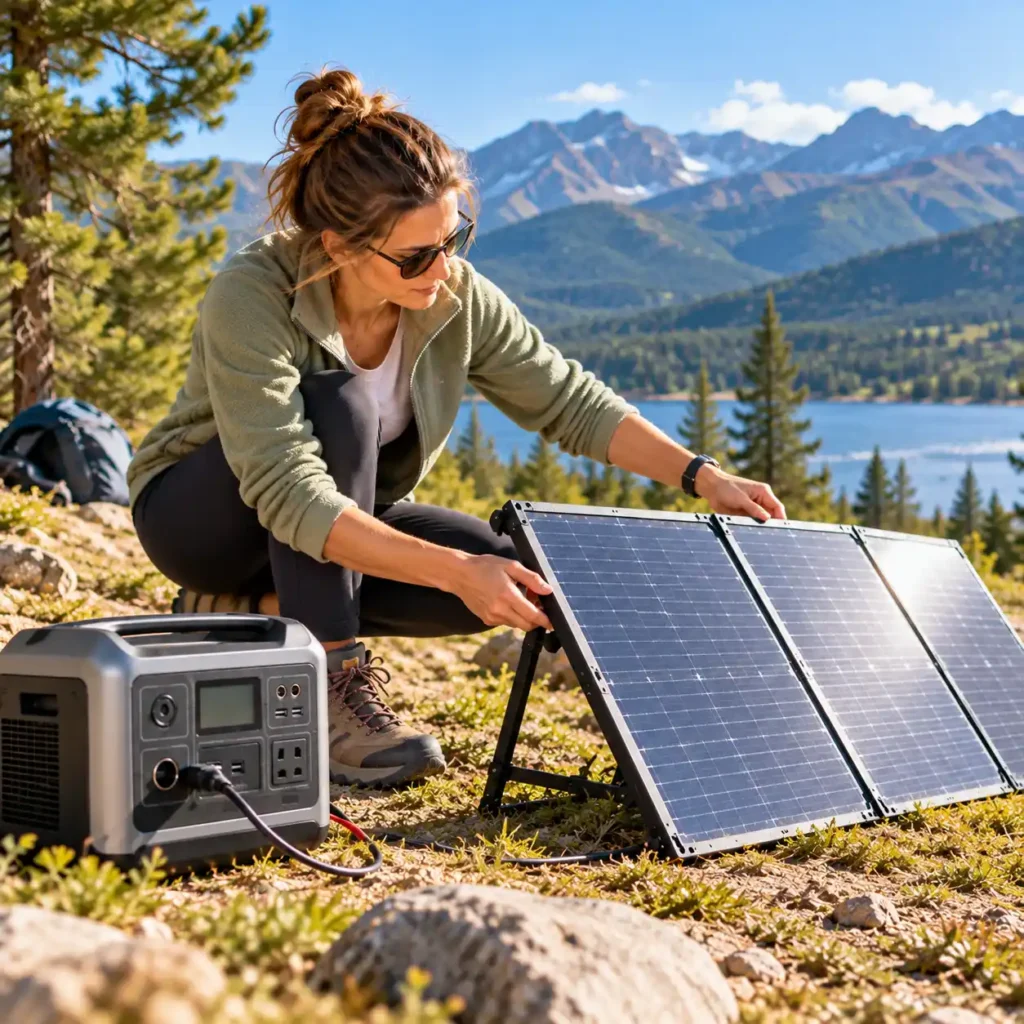
If your portable power station detects solar input but charges slowly or displays less wattage than expected, the problem may be the amount of sunlight reaching the panels. Even a compatible solar panel can produce substantially less power when sunlight is weak, the panel is partially shaded, or its position limits the light it receives.
Before changing cables or replacing equipment, check the panel’s surroundings and position. Solar input depends on environmental conditions as well as the panel’s electrical specifications, so low wattage does not automatically indicate a fault.
Why Direct Sunlight May Still Produce Low Input
A solar panel can be in direct sunlight and still produce less power than its rated output. The amount of electricity it generates depends on the intensity of the sunlight reaching its surface, the angle of the panel, cloud cover, temperature, and other operating conditions.
Several factors can explain unexpectedly low solar input:
Reduced solar irradiance: Solar panels generally produce more power when stronger sunlight reaches their surface. Haze, atmospheric conditions, and weaker sunlight can reduce output even when the sky looks bright.
Cloud cover: Thin or passing clouds can reduce the available sunlight, causing the station’s displayed input wattage to fluctuate. Heavy cloud cover can reduce output much more substantially.
Panel angle: A panel facing away from the sun receives less direct sunlight than one positioned more favorably. The effect changes as the sun moves across the sky.
Panel temperature: Solar cells generally become less efficient as their temperature rises. A panel in strong sunlight can therefore produce less power than its rated output, even when illumination is good.
Rated versus actual output: A panel’s advertised wattage is typically measured under specified test conditions. Real-world sunlight, temperature, orientation, and system limitations often prevent it from continuously reaching that rating.
The power station itself can also limit the amount of energy it accepts. If the panel is receiving good sunlight but the displayed input remains low, check the station’s supported voltage, current, and power limits as well as the environmental conditions.
The important distinction is between reduced solar generation and a charging compatibility problem. Environmental conditions can explain low input, but they do not establish that the panel and power station are electrically compatible.
How Partial Shade Affects Solar Output
Partial shading can reduce solar output even when most of the panel remains in direct sunlight. The effect depends on the panel’s electrical design, the position and extent of the shadow, and how its cells are interconnected.
Common sources of partial shade include:
Trees and branches: Moving leaves or branches can cast changing shadows across the panel.
Buildings and walls: A building may shade part of the panel even when the surrounding area is sunny.
Railings and vehicle equipment: Balcony railings, roof racks, open doors, and other narrow objects can cast shadows across individual sections of a panel.
Camping equipment: Tents, awnings, chairs, or nearby vehicles may block sunlight during part of the day.
The panel’s own surroundings: A cable, support, or nearby object can create a shadow that is easy to overlook when checking the overall scene.
A shaded section does not necessarily reduce output in direct proportion to the area covered. Depending on the panel’s cell arrangement and bypass-diode design, shading part of a panel can affect the output of a larger section of the module. If several panels are connected together, the effect also depends on their wiring configuration.
To investigate a suspected shading problem, look across the entire panel surface rather than checking only its center. Move nearby objects where practical and observe whether the input reading changes after the shadow has been removed.
If the panel is fully illuminated but the input remains unexpectedly low, do not assume that shade is the only cause. Continue checking panel compatibility, cable connections, and the power station’s input limits.
How to Test the Panel Under Better Conditions
A short, controlled check can help you determine whether poor sunlight or panel positioning is contributing to low solar input. You do not need to calculate daily solar generation to perform this test.
Choose a suitable location. Place the panel where it receives unobstructed sunlight, away from shadows cast by trees, buildings, vehicles, railings, or camping equipment.
Position the panel correctly. Fully unfold or deploy it according to the manufacturer’s instructions. Adjust its angle toward the sun without placing it where it could fall, overheat, or become a tripping hazard.
Check the connections. Before making or changing connections, follow the manufacturer’s procedure. Confirm that the cable and connectors are compatible, secure, and undamaged.
Observe the input reading. Check the power station’s displayed solar input wattage and, if available, its input voltage and current. Note the conditions under which you take the reading.
Compare the results. If the input increases after you remove shade or improve the panel’s position, environmental conditions were likely contributing to the low output. If the reading remains unexpectedly low, investigate electrical compatibility and the charging system.
Repeat under reasonably stable conditions. Passing clouds and changing sunlight can affect the result, so avoid drawing conclusions from a single brief reading.
Do not disconnect or reconnect cables while the equipment is operating unless the manufacturer explicitly permits that procedure. Solar panels can produce voltage whenever they receive light, so follow the equipment’s instructions when changing the setup.
If the panel produces little or no input even in unobstructed sunlight, return to the earlier diagnostic checks. Verify the cable and adapter, confirm the panel’s voltage against the station’s PV input limits, and check for any charging warnings.
The practical takeaway: Remove avoidable shade, position the panel to receive unobstructed sunlight, and compare the station’s input readings under stable conditions. A clear improvement suggests that sunlight or positioning contributed to the problem. If the input remains low, continue troubleshooting rather than assuming that the panel is defective.
Check Charging Settings, Battery Limits, and Error Codes
If your portable power station is connected to compatible solar panels but still does not charge, check its battery status, temperature conditions, and charging settings before assuming that a component has failed. Some stations temporarily reduce or stop charging to protect the battery, while others change their charging behavior when the battery approaches its target charge level.
The display may help distinguish normal charging behavior from a possible problem. Check the solar input wattage, battery percentage, temperature indicators, and any error messages available on your model. These readings provide useful clues, but the exact cause depends on the station’s design and operating conditions.
Check Battery Temperature and Charging Protection
Portable power stations have specified battery operating and charging temperature limits. If the battery becomes too hot or too cold, its battery management system (BMS) or charging controls may reduce charging power or temporarily prevent charging to protect the battery.
This can occur even when the solar panels, cables, and connectors are compatible. For example, a station exposed to very cold conditions may refuse to charge until the battery warms into its permitted charging range. A battery that becomes too hot may also trigger a protective response.
If you suspect a temperature-related restriction, check the following:
Temperature warnings: Look for a temperature indicator, warning message, or error code on the display or in the manufacturer’s companion app, if available.
Operating conditions: Consider whether the station has been exposed to cold weather, direct heat, or prolonged operation in a hot environment.
Specified charging range: Consult the manual for the permitted battery charging temperature range. Do not assume that the panel’s ability to produce electricity means the battery can safely accept it under current conditions.
Recovery procedure: Follow the manufacturer’s instructions for allowing the station to return to an acceptable temperature before attempting to charge again.
Move the station to a suitable environment only as permitted by the manufacturer. Allow it to return to the specified temperature range naturally, and do not use external heating or cooling methods unless the manufacturer explicitly approves them.
A temperature-related charging restriction may be temporary, but do not assume that every charging interruption is caused by temperature. If the station remains unable to charge after returning to suitable conditions, check its error messages and continue with the other diagnostic steps.
Check Whether the Battery Is Already Full or Charging Is Limited
A portable power station may reduce its charging power as the battery approaches its target charge level. This is normal behavior for many battery charging systems and does not necessarily indicate a fault.
When a battery is nearly full, the charging system may gradually reduce the current supplied to the battery. As a result, the displayed solar input wattage can fall even when the panels are receiving good sunlight and the connections are working correctly.
However, low charging power near full capacity is different from a complete absence of solar input. If the battery is already at its target level, a low or zero reading may be consistent with the station’s charging behavior. If the battery is substantially below its target level and the display continues to show 0 W, investigate other possible causes.
Check these factors:
Battery percentage: Confirm whether the battery is nearly full or still has substantial capacity available.
Charge limits: Some models allow users to set a target charge percentage or activate battery-saving features. Check whether a configured limit explains why charging has stopped.
Charging mode: Review any settings that limit charging power or change how the station manages incoming energy.
Input readings: If the display provides solar input wattage, voltage, or current, note these values alongside the battery percentage.
Manufacturer guidance: Check how your specific model behaves when it reaches its target charge level.
Do not assume that a displayed 100% battery level always means the station will stop drawing all electricity or behave identically to other models. Charging controls, battery management, and display behavior vary by product.
If the battery is not full and the station reports no solar input, return to the cable, voltage, sunlight, and compatibility checks described earlier. A charge limit may explain some charging behavior, but it should not be used as a catch-all explanation for every zero-watt reading.
Follow the Manufacturer’s Instructions for Input Errors
If your power station displays an input error, warning symbol, or charging fault message, check the documentation for the exact model before changing settings or attempting a reset. Error codes and recovery procedures are not universal, even among products from the same manufacturer.
An input warning may relate to voltage, current, temperature, a connection problem, or another operating condition. The displayed message is a useful starting point, but its meaning must be confirmed using the manufacturer’s official guidance.
Use this procedure:
Record the exact message. Note the error code or warning text, the solar input reading, and the battery percentage.
Identify the model. Confirm the complete model name and any relevant hardware version.
Consult the official manual. Find the troubleshooting entry for the displayed code or warning. If the manual refers to a companion app or support page, use the corresponding official resource.
Follow the documented response. Some errors may require waiting for a temperature condition to clear; others may require inspecting the input configuration or contacting support. Follow only the procedure specified for your station.
Avoid repeated resets. Do not repeatedly restart the station or reconnect the panels without understanding the warning, particularly if the message may indicate excessive input voltage, an electrical fault, or a protection event.
Contact manufacturer support if needed. If the error persists, the manual does not explain it, or the station appears damaged, stop troubleshooting and request model-specific guidance.
Do not apply a reset sequence found for another power station simply because the display or connector looks similar. A reset may not address the underlying cause, and it cannot make an electrically incompatible solar array safe.
If an error appears after connecting multiple panels, review the array’s voltage and current characteristics before reconnecting it. If the warning indicates that an input limit may have been exceeded, do not reconnect the same configuration until its compatibility has been verified.
The practical takeaway: Check battery temperature, charge limits, and error messages before concluding that the solar panel or power station is defective. Normal charging behavior can reduce input power near the target charge level, while temperature protection and input errors may stop charging altogether. Use the manufacturer’s documentation to distinguish these conditions and determine the appropriate next step.
How to Identify a Faulty Solar Panel, Cable, or Power Station
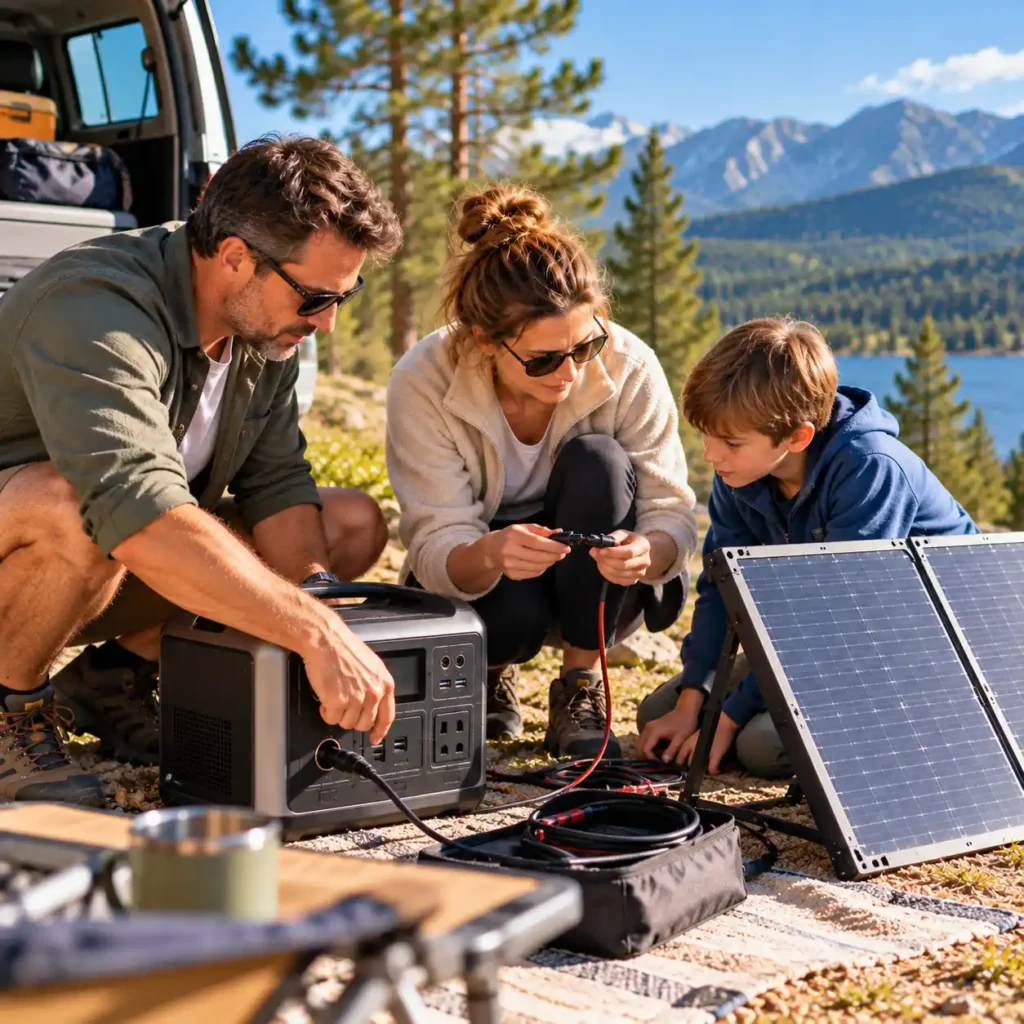
If your portable power station still does not charge from solar panels after you have checked the connections, input voltage, panel configuration, sunlight, and charging settings, the next step is to isolate the components that may be causing the problem.
The goal is to determine whether the issue is more likely to involve the solar panel, its cable or adapter, the panel configuration, or the power station itself. A single symptom rarely proves that a particular component has failed, so test only one variable at a time and compare the results.
Before testing, confirm that every panel, cable, and charging method is compatible with your power station. Follow the manufacturer’s instructions for disconnecting and reconnecting equipment, and do not test a configuration that may exceed the station’s voltage or current limits.
If you need to compare panel specifications, our guide to portable solar panels explains the key features to consider when evaluating solar equipment.
Test One Compatible Solar Panel at a Time
If your setup uses multiple panels, temporarily testing one compatible panel at a time can help narrow down the source of the problem. This is useful when the station accepts input from one panel but stops charging when additional panels are connected.
Only perform this test if the manufacturer permits the configuration and provides a safe procedure for changing the connections.
Follow these steps:
Check the original setup. Record the solar input reading, battery percentage, connected panels, and any displayed warning before changing anything.
Isolate the array safely. Follow the manufacturer’s procedure for disconnecting the panels. Do not disconnect connectors under load unless the manufacturer explicitly permits it.
Connect one compatible panel. Use a panel and cable known to meet the station’s supported input requirements. Verify polarity and voltage compatibility before connecting.
Observe the input reading. Check whether the station detects solar input and whether the reading remains reasonably stable under suitable sunlight.
Repeat only with approved components. If the manufacturer permits it, test another compatible panel or cable separately while keeping the other conditions as consistent as practical.
Compare the results. Note whether the problem follows a particular panel, cable, or configuration. Treat the result as a clue rather than definitive proof of a failed component.
If one compatible panel works while another does not, the difference may point toward a panel, cable, connector, or adapter problem. However, changing sunlight conditions or differences between the panels can also affect the result.
If a single panel works but the full array does not, revisit the combined voltage, current, power, and wiring configuration. The problem may be related to the array’s compatibility with the station rather than a defective panel.
Never combine test components simply because their connectors fit. Every test configuration must remain within the manufacturer’s specified electrical limits.
Check Whether Another Supported Charging Method Works
If your power station supports AC charging or another approved charging method, checking that method can help establish whether the station can accept power through a different input.
For example, if the station charges normally from a wall outlet but not from solar panels, the issue may be specific to the solar charging path. Possible causes include the solar cable, panel compatibility, input configuration, charging settings, or the station’s solar input circuitry.
However, successful AC charging does not prove that the solar input is working correctly. Different charging methods may use different input connectors and charging electronics, so one can function while another has a problem.
Likewise, if the station fails to charge using several supported methods, the result may suggest a broader charging issue, but it does not establish that the battery or another specific component has failed.
To compare charging methods safely:
Use only supported inputs. Confirm that the charging method and accessories are approved for the exact model.
Follow the correct procedure. Connect each charging source according to the manufacturer’s instructions and observe any restrictions on simultaneous inputs.
Check the indicators. Record whether the station detects the source, displays input power, or reports an error.
Keep conditions in mind. Solar input depends on sunlight and panel conditions, while AC charging depends on the wall supply and the station’s AC charging settings.
Avoid unnecessary resets or repeated connection attempts. If the station displays a warning, follow the relevant troubleshooting procedure before continuing.
If AC charging works but solar charging does not, return to the solar-specific checks first. If multiple supported charging methods fail, or the station shows persistent warnings, stop testing and consult the manufacturer.
When to Contact Manufacturer Support
Contact the manufacturer’s support team if basic compatibility and connection checks do not resolve the problem, or if further testing would require procedures that are not documented for your model.
Stop troubleshooting and seek support in the following situations:
The station displays a persistent input error. The warning remains after you have followed the manufacturer’s prescribed troubleshooting procedure.
The equipment is visibly damaged. A cable, connector, panel, or power station has exposed conductors, melted insulation, damaged ports, or other signs of physical damage.
You suspect an overvoltage event. The connected array may have exceeded the station’s maximum permitted PV input voltage.
The station becomes unusually hot or behaves abnormally. Stop using the equipment and follow the manufacturer’s safety instructions.
Several supported charging methods fail. The station does not accept power from multiple compatible sources under the conditions specified by the manufacturer.
The fault appears to be inside the unit. Further investigation would require opening the power station, accessing internal components, or bypassing its protective systems.
The correct test procedure is unclear. You cannot establish whether a proposed connection or test configuration is safe and supported.
Do not open the power station, bypass its battery management system, or attempt internal repairs unless you are specifically qualified and authorized to perform the work under the manufacturer’s procedures.
When contacting support, provide the full model name, the solar panel specifications, the cable and adapter types, the panel wiring configuration, the displayed input readings, any error codes, and the checks you have already performed. This information can help support staff narrow down the issue without asking you to repeat unnecessary tests.
Diagnostic Table: What Your Test Results May Indicate
Use the table below to identify the most relevant next step. The observations are diagnostic clues, not conclusive proof that a particular component has failed.
| Observation | Possible Diagnostic Direction | Next Step |
|---|---|---|
| One compatible panel works, but another does not | A difference in the panel, cable, connector, or adapter may be involved | If permitted by the manufacturer, check the panels and cables individually using a known-compatible setup. |
| Charging works with one panel but not with several | The combined array configuration or an input limit may be responsible | Recheck combined Voc, input current, total power, and the supported wiring arrangement. |
| AC charging works, but solar charging does not | The problem may be specific to the PV connection, solar input settings, or solar charging circuitry | Follow the manufacturer's solar troubleshooting procedure and verify panel and cable compatibility. |
| No supported charging source charges the station | A broader charging fault may be present | Stop repeated testing and contact the manufacturer's support team or an authorized service provider. |
The results become more useful when you change only one component or condition at a time. For example, replacing a cable and moving the panel into better sunlight simultaneously may improve charging, but it will not reveal which change made the difference.
The practical takeaway: Isolate compatible components methodically, compare the results, and use the evidence to decide what to check next. If the problem persists, an input error appears, or safe testing is no longer possible, stop and contact the manufacturer rather than assuming that one component is definitively faulty.
Practical Safety Checklist
Before troubleshooting a portable power station that is not charging from solar panels, verify that every connection and test follows the manufacturer’s safety instructions. Solar panels can produce electrical voltage whenever they receive light, so an apparently simple connection problem should not be investigated by improvising electrical tests.
Use this checklist before continuing:
Verify electrical compatibility. Check the solar panel’s voltage, current, connector configuration, and other relevant specifications against the requirements of your exact power station before connecting it.
Stay below the maximum PV input voltage. Account for the increase in open-circuit voltage (Voc) that can occur at low temperatures, particularly when multiple panels are connected in series.
Follow the approved wiring configuration. Do not change series or parallel connections, combine panels, or add adapters without confirming that the resulting configuration is supported by the manufacturer.
Never short connector contacts to test polarity. Verify positive and negative connections using the manufacturer’s markings, wiring diagrams, or an appropriate measurement procedure.
Avoid connecting or disconnecting under load. Do not make or break solar connections while current may be flowing unless the manufacturer explicitly permits the procedure.
Do not open the power station or bypass protection. Never attempt to defeat the battery management system, modify internal circuitry, or bypass electrical safeguards to restore charging.
Stop if damage or abnormal behavior appears. If you notice damaged insulation, exposed conductors, unusual overheating, persistent electrical warnings, or other signs of a possible fault, stop testing and follow the manufacturer’s safety instructions.
If you cannot verify the electrical compatibility of the equipment or determine how to perform a test safely, do not proceed by trial and error. Consult the official manual or contact the manufacturer’s support team.
Safety rule: Protect the equipment and yourself first. Identifying the cause of a charging problem is not worth the risk of exceeding input limits, creating an unsafe connection, or bypassing protective systems.
Frequently Asked Questions
Why Does My Portable Power Station Show Voltage but 0 W?
A solar input voltage reading does not necessarily mean that the power station is receiving usable charging power. The panel may produce voltage while the available current is too low, the input conditions fall outside the station’s supported operating range, or the charging system does not accept the input under the current conditions. Check the panel’s Voc and Vmp against the station’s specifications, inspect the cable and connectors, and verify that no charging warning or restriction is active.
Can I Use a Solar Panel with a Higher Wattage Rating Than My Power Station Supports?
Possibly, but only if the panel’s electrical characteristics and the proposed configuration comply with the power station manufacturer’s requirements. A panel with a higher rated wattage does not automatically exceed the station’s voltage or current limits, but its Voc, operating voltage, current, and maximum input power must all be checked. Never connect a panel or array that exceeds the station’s permitted input voltage, and do not assume that a higher wattage rating is safe simply because the station can limit the power it accepts.
Can Solar Panel Current Exceed the Station's Rated Input Current?
Do not assume that a panel or array is compatible just because its voltage falls within the station’s supported range. The station may specify a separate maximum input-current limit, and the manufacturer may impose additional restrictions on the panel configuration. Check the station’s manual and the panel specifications before connecting the equipment. Whether a particular source can safely provide more current than the station accepts depends on the input design and the manufacturer’s stated limits; do not rely on current limiting or protective features unless the manufacturer explicitly documents the arrangement as supported.
Why Does My Power Station Charge Only in Strong Sunlight?
The panel may produce insufficient power under weaker sunlight to maintain charging, particularly if its operating voltage approaches the station’s minimum input requirement. Cloud cover, partial shade, panel angle, and temperature can also affect solar output. Position the panel in unobstructed sunlight, check the displayed input readings, and compare its operating voltage with the station’s specifications. If charging remains inconsistent under stable, favorable conditions, inspect the connections and verify that the panel is compatible with the station.
Why Does AC Charging Work but Solar Charging Does Not?
AC charging and solar charging may use different input connections and charging circuitry, so successful AC charging does not prove that the solar input is working correctly. The cause may be an incompatible panel, cable or adapter problem, unsuitable PV voltage, an input-current restriction, or a fault affecting the solar charging path. Check the solar-specific requirements and any displayed error codes. If a compatible panel and cable still produce no input, follow the manufacturer’s troubleshooting procedure or contact support.
Can I Use Third-Party Solar Panels with My Portable Power Station?
Yes, some portable power stations support compatible third-party solar panels, but compatibility must be verified for the exact model and configuration. Check the panel’s Voc, Vmp, current specifications, connector type, polarity, and the station’s permitted PV input voltage, current, and power limits. Also confirm that any adapter or extension cable is suitable for the connection. A connector that fits does not guarantee electrical compatibility. If the manufacturer does not clearly document the setup, obtain confirmation before connecting the panel.
Conclusion: Diagnose the Input Before Replacing Equipment
If your portable power station is not charging from solar panels, do not assume that the panel or the station is defective before checking the entire charging path. A systematic diagnosis can help you identify compatibility problems, connection issues, environmental limitations, or charging restrictions without replacing equipment unnecessarily.
Follow this sequence:
Check the display. Determine whether the solar input shows 0 W, low or fluctuating power, or an error message.
Inspect the connections. Check the cable, adapters, connectors, and polarity for damage or incompatibility.
Verify voltage and compatibility. Compare the panel’s electrical specifications with the station’s permitted PV input voltage, current, and power limits. Account for the possible increase in open-circuit voltage in cold weather.
Check sunlight and panel position. Remove partial shade, position the panel in unobstructed sunlight, and observe whether the input reading improves.
Review charging settings and warnings. Check the battery’s charge level, temperature conditions, charging limits, and any model-specific error codes.
Isolate the faulty component. If the problem persists, test compatible panels, cables, and supported charging methods individually, following the manufacturer’s instructions.
Remember that a connector that fits does not guarantee electrical compatibility, and a single display reading rarely proves that a particular component has failed. Always verify the electrical limits and follow the safety instructions for your exact power station before changing the setup.
If these checks do not resolve the problem, or the station displays a persistent warning or shows signs of damage, stop troubleshooting and contact the manufacturer’s support team.
The bottom line: Diagnose the solar input before replacing equipment. Checking the display, connections, electrical compatibility, sunlight, and charging settings in a consistent order gives you a clearer basis for deciding what to do next.